Carnivore Diet Homemade Beef Jerky
- Rachael Elizabeth

- Feb 23, 2022
- 3 min read
Updated: Apr 11, 2024
Here's how to make the best sugar free beef jerky! This recipe is carnivore diet, lion diet, and keto diet approved (but can be enjoyed by all)

When I first started the carnivore diet, I searched for a beef jerky recipe that didn't have spices/marinades and didn't find one! So I experimented for myself and discovered that jerky still tastes great with just beef and salt.
Beef jerky makes for the perfect snack to bring with you on the go and it's so easy to make!
Carnivore Diet Homemade Beef Jerky
Ingredients & Supplies
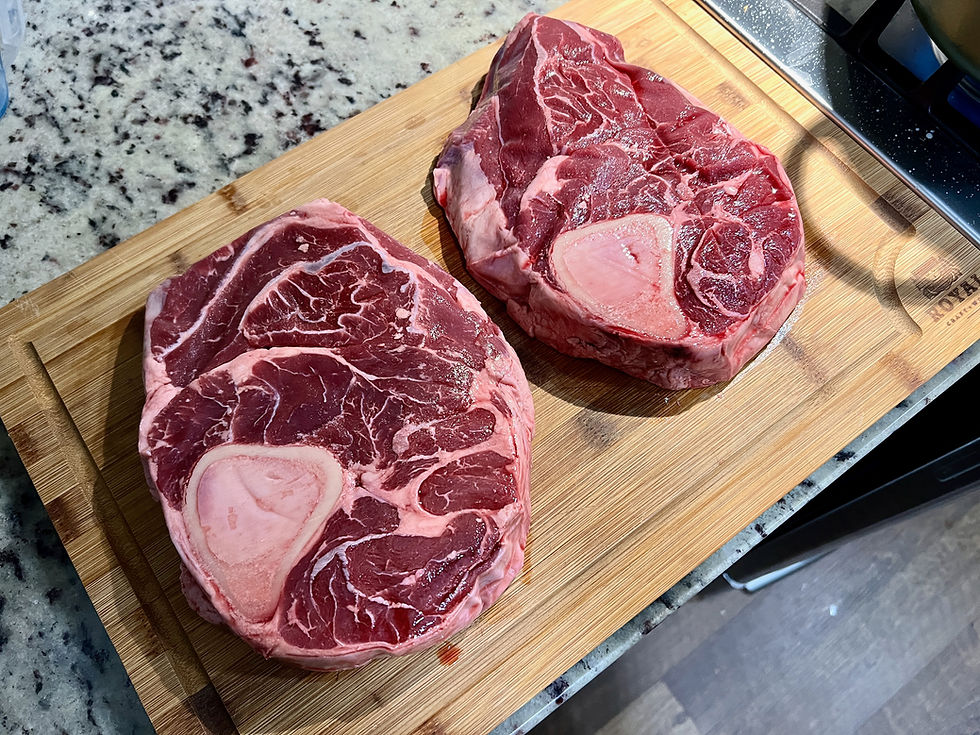
1-2lbs of beef stir fry strips or very thinly sliced meat
Redmond's Real Salt (I like the powdered version for jerky, as it the meat really soaks it up for a richer flavor, use the code RIBEYERACH for a discount)
Stainless Steel Dehydrator (use the code "RACH30" for 30% off)
*Beef stir fry strips: Often grocery stores will sell beef "stir fry strips", which is beef that is already cut to the perfect size for making jerky. This makes the whole process so much easier! If you would like to cut them yourself, cuts of beef that work really well for jerky are bottom round, top round, london broil, and sirloin.
*Important tip: Most butchers are willing to cut roasts for you into jerky sized strips. Ask them nicely and let them know you want the strips very thin (thick slices don't work well for jerky). They'll know what to do. They typically don't charge extra for this. Having the beef pre-cut makes will make this recipe much quicker and more enjoyable!
Instructions
Take beef strips out of the fridge and salt them generously
Arrange them in your dehydrator very close together but not overlapping.
Set dehydrator to 165 degrees for 3 hours. At about 3 hours, start checking on the jerky every 20-30 minutes to see if it's cooked how you would like it. Some people prefer it more soft (like me) and others prefer it very dry.
Cook times vary depending on the thickness of the strips of beef and personal preference. I typically let mine cook for around 3 hours. But some go 4 hours or longer. Experiment with it and you'll find what you like the best!
Store in the fridge (lasts for about a week) or the freezer indefinitely. Chances are you'll eat this up way faster than you'd have to worry about it going off. You can definitely keep your jerky out of the fridge and unrefrigerated on the go, but because I like the jerky a bit softer I prefer to keep it in the fridge.
*Personally, I love my corosi stainless steel dehydrator because its so easy to use, clean, and store. You can put all the trays straight into the dishwasher! It's also very easy to take the lid off and taste-test the jerky at any point during the cooking process. If you're anything like me though, you'll eat half of the batch before its even done, haha!
*When I make my beef chips with thinly sliced NY strip steak (as shown in the feature image), I like to dehydrate them for much longer and make them crispy. You can find very thinly sliced steak at many Costcos in the USA. It makes for amazing jerky and the fat gives it a buttery and rich flavor. I do the exact same thing as with the stir fry strips, but cook for 8-10 hours.

Histamine Intolerance Tips
For those of you with histamine intolerance, you may want to cook your jerky for a shorter amount of time. The longer you cook it, the higher in histamine the meat will be. So make sure your beef strips are very thin so they'll dehydrate quickly!
To minimize histamine build-up, store your jerky in the freezer. Frozen jerky still tastes good, I promise!
Another thing to consider is getting un-aged beef. This can make a huge difference from store-bought meats that are typically aged for around 30 days. I use unaged beef from White Oak Pastures (use "RIBEYERACH" for 15% off), Northstar Bison, or BillyDoe Meats and that makes a big difference in my reactions.
Don't give up on healing your histamine intolerance, but of course be very careful if your reactions are severe. Things like meditation, eating outside, and reducing stress/anxiety can greatly reduce reactions (as our bodies produce histamines, too).
Hope you love your jerky! Let me know how it goes in the comments below.
Some of the links in this blog post may be affiliate links! This basically means that if you purchase something through the link, I might receive a small commission (at no extra charge to you). Thank you so much for supporting my blog! ❤️️


This is the first Baltic watch link to introduce a date complication, which link might explain the decision to excise the recessed marker styling cue from prior models (as only recessing two markers might've looked a little odd). The date window is nestled right at six link o'clock, with a black background that keeps it from breaking up the dial symmetry.
The 16660 houses the upgraded Caliber 3135 movement, known for its link reliability and improved performance. The link watch retained the helium escape valve, a critical feature for professional divers who work in saturation settings, which allows the safe release of helium link gas that can accumulate during deep-sea diving operations.
There's something intuitive about fishing, link but using the Fishing Gear is anything link but. The instruction booklet for link Casio's Module 3485 is about as lengthy as Hemingway's The Old Man and the Sea, the only difference is that you walk away from one of these with a deeper understanding of the art.
My watch list is lengthy and more about precious metals and a dressy style than steel sports watches. This is very link different from, let’s say, 10–15 years ago when link I was more into sporty watches. Now, without further ado, link let me share a part of my watch list with you.
The new guy uses Seiko's caliber link 8L35, with a 50 hour power reserve; it's a 26 jewel, link 28,800 vph motor and should give significantly better performance and longevity than the original's caliber 6105A, which has 17 jewels and runs at 21,600 vph. SLA033 is also a bit larger than the original, at 45mm in diameter, but it feels like an appropriate size for the design; the 6105 after all, in the version being reproduced by link SLA033, was a 44mm watch.